More to explore
-
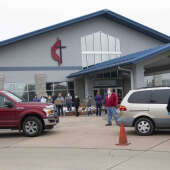
 Local News 4/18/24Catholic Charities to hold ribbon-cutting for LifeHouse grand openingLifeHouse Crisis Maternity Home will provide education and support to pregnant women and new mothers at risk of homelessness. After 15 months of construction, the first resident will move in at the end of April. ...
 -
 Local News 4/18/24Tenmile looks to add balcony to old Esquire Theater building1Cape Girardeau City Council approved a license and indemnity agreement with Tenmile Holdings LLC on Monday, April 15, for the installation of a marquee sign and awning with column posts for the old Esquire Theater building. ...
 -
 Local News 4/18/24SEMO Orchestra to perform Elgar, Dvorak next week at River CampusThe Southeast Missouri State University Orchestra and guest cellist Julian Schwarz will present a two-piece program Tuesday, April 23, at the River Campus in Cape Girardeau. The concert will begin at 7:30 p.m. in Bedell Performance Hall, 518 S....
 -
 Local News 4/18/24Police: Bollinger County woman told elaborate lies across multiple investigations, including sexual assault4BOLLINGER COUNTY � Police say a Bollinger County woman told several elaborate lies during sexual assault and harassment investigations in a complex and escalating scheme that targeted the mother of her fiance�s child. Michelle D. Kaempfer of Glen...
 -
 Local News 4/18/24Jackson police, DEA host National Prescription Drug Take Back Day1The Jackson Police Department and Drug Enforcement Administration (DEA) will team up to host DEA�s National Prescription Drug Take Back Day on Saturday, April 27. The two organizations will collect different forms of prescription drugs. The...
 -
-

-

-
-

-

-
-
-

-
-
-

-
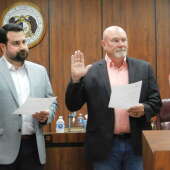
 Local News 4/16/24New Cape Girardeau City Council members sworn in; multiple appointments made to advisory boards3The Cape Girardeau City Council swore in new members and approved various appointments to multiple advisory boards Monday, April 15. New council members David Cantrell, Ward 4, and Rhett Pierce, Ward 5, took the oath of office at the meeting....
 -
 Local News 4/16/24Fredericktown woman arrested in Cape on charges of stealing car, possessing drugs3Anna J. Dobyns, 40, is in the custody at the Cape Girardeau County jail in lieu of a $40,000 bond on charges of first-degree tampering with a motor vehicle, possession of a controlled substance and unlawful possession of drug paraphernalia. ...
 -
 Local News 4/16/24Judge awards $23.5 million to undercover St. Louis officer beaten by colleagues during protest6ST. LOUIS � A St. Louis judge Monday awarded nearly $23.5 million to a former police officer who was beaten by colleagues while working undercover during a protest. Luther Hall was badly injured in the 2017 attack during one of several protests that...
 -
-
 Local News 4/15/24Cape airport explores funding for possible new air traffic control tower12As Cape Girardeau Regional Airport�s construction projects move along, airport manager Katrina Amos and the Airport Advisory Board may start to look at possible funding options for a new air traffic control tower. Amos said the next big project on...
 -
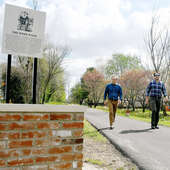 Local News 4/15/24Take a hike: Charleston introduces the town�s first trail � The Byrd WalkCHARLESTON � The late James L. "Jim" Byrd III loved his hometown of Charleston. He also loved trains. Now his family has combined those two loves to continue to grow Byrd�s legacy. With funds from Byrd�s estate, a new walking path was recently...
 -

-

-

-

-
-
 Most read 4/12/24Notre Dame to transition to president/principal model beginning July 17Notre Dame Regional High School announced Monday, April 8, that it will be transitioning to a president/principal model Monday, July 1. Current principal Tim Garner will assume the role of president, while assistant principal Paul Unterreiner will...
 -
 Most read 4/12/24Coroner still hasn't found attorney as Missouri AG seeks to remove him from office13More than two months after the Missouri Attorney General's Office filed court action to remove Cape Girardeau County Coroner Wavis Jordan from office, the local officeholder has still not found an attorney to help him fight to keep his job. Wavis...
 -

-

-